Restore Comfort Fast Today
How to Clean Your AC Condenser Coils in 5 Easy Steps
Boost Efficiency and Lower Your Energy Bills
Why Clean Condenser Coils Matter for Arizona Homeowners
Condenser coils are the unsung workhorses of your air conditioning system. Positioned in the outdoor unit, these thin metal fins facilitate the transfer of heat from inside your home to the outdoor air. When coils are clean, refrigerant flows efficiently, heat dissipates quickly, and your system maintains comfortable indoor temperatures without excessive strain. When coils become clogged with dust, pollen, cottonwood fluff, or the fine desert sand common throughout the Phoenix metro area, airflow is restricted, heat transfer slows, and your compressor must run longer to achieve the same cooling effect. The result is higher energy consumption, increased wear on critical components, and a significantly higher risk of costly breakdowns during the peak cooling season.
In Laveen and surrounding communities, outdoor units face unique challenges. The combination of fine particulate dust blown in from agricultural fields to the south, seasonal cottonwood seed dispersal in late spring, and post-monsoon debris means condenser coils can accumulate blockages faster than in many other climates. Homeowners who neglect coil maintenance often see their monthly utility bills climb by fifteen to twenty-five percent during June through September, when systems run nearly continuously. Beyond the financial impact, dirty coils reduce the lifespan of your compressor, often the most expensive component to replace, and can trigger refrigerant pressure imbalances that lead to complete system failure on the hottest days of the year.
Regular coil cleaning restores airflow, improves heat exchange efficiency, and allows your system to operate within its designed temperature and pressure ranges. Most HVAC professionals recommend cleaning condenser coils at least once per year, ideally in early spring before cooling season begins. For homes near unpaved roads, in areas with heavy landscaping, or with pets that shed outdoors, twice-annual cleaning may be necessary. The steps outlined in this guide will help you perform this essential maintenance safely and effectively, using basic tools and a few hours of your time.
Power Down and Prepare Your Work Area
Safety is the foundation of any successful maintenance task. Before you begin, locate your outdoor disconnect box, typically mounted on the exterior wall near the condenser unit or directly on the unit itself. Open the disconnect and remove the fuses or switch the breaker to the off position. For added protection, go to your main electrical panel and turn off the dedicated circuit breaker that controls your air conditioning system. Verify that the unit is completely powered down by attempting to turn on your thermostat and confirming that the outdoor fan does not start. This double-check prevents accidental startup while your hands are near moving parts or electrical connections.
Next, gather your tools and materials. You will need a garden hose with an adjustable spray nozzle, a fin comb or soft brush, a screwdriver set (typically Phillips and flathead), work gloves, safety glasses, and a commercially available coil cleaner solution designed for outdoor condenser coils. Avoid using acidic household cleaners, bleach, or pressure washers, all of which can damage the delicate aluminum fins or corrode copper tubing. If you do not have a coil cleaner on hand, a mixture of mild dish soap and water can serve as a temporary alternative, though dedicated coil cleaners are formulated to break down oily residues and mineral deposits more effectively.
Clear the area around the unit by removing any planters, garden tools, or yard debris within a three-foot radius. Trim back any shrubs, vines, or ornamental grasses that have grown within twelve inches of the unit, as vegetation reduces airflow and contributes to faster coil fouling. In Laveen, many homeowners plant desert-adapted shrubs for shade, but maintaining adequate clearance is essential for system performance. Lay down a tarp or old towel to catch any debris or cleaning solution runoff, particularly if the unit sits on decorative rock or near delicate landscaping. With your workspace prepared and power confirmed off, you are ready to begin the disassembly and inspection process.
Remove Debris and Apply Cleaning Solution
With the power off and your workspace prepared, remove the top grille or fan assembly to access the coil interior. Most units are secured with four to six screws or bolts around the perimeter. Set these fasteners in a small container so they do not get lost in the yard. Carefully lift the fan assembly, taking care not to strain the electrical wires still connected to the motor. If the wires are short, you may need to disconnect them, but take a photo first to ensure correct reconnection later. Rest the assembly on a stable surface or gently lean it against the unit if the wires allow.
Inspect the coils for visible debris. In the Laveen area, you will often find a dense mat of cottonwood seeds, dust, dried grass clippings, and even small leaves packed against the outer fins, particularly on the side facing prevailing winds from the southwest. Use your hands (with gloves) or a soft brush to gently remove large debris. Work carefully to avoid bending the fragile aluminum fins. If fins are already bent, use a fin comb, a specialized tool with multiple blade widths, to gently straighten them. Insert the comb at the top of the fin section and pull downward in smooth, even strokes. Straightening bent fins can restore up to fifteen percent of lost airflow, a meaningful improvement in system performance.
Once large debris is cleared, apply your coil cleaner. Shake the bottle and spray evenly across the entire coil surface, working from top to bottom. Most coil cleaners are foaming formulas that cling to vertical surfaces, allowing the active ingredients time to dissolve dirt, pollen, and oily residues. Pay special attention to areas with visible buildup or discoloration. Allow the cleaner to sit for the time specified on the product label, typically five to ten minutes. During this dwell time, the solution breaks down contaminants and begins to loosen particles embedded between the fins. Avoid letting the cleaner dry completely, as this can leave a residue that attracts future dirt. If you are working in direct sun during a hot afternoon, consider shading the unit with a patio umbrella or large piece of cardboard to slow evaporation.
Rinse Thoroughly and Reassemble the Unit
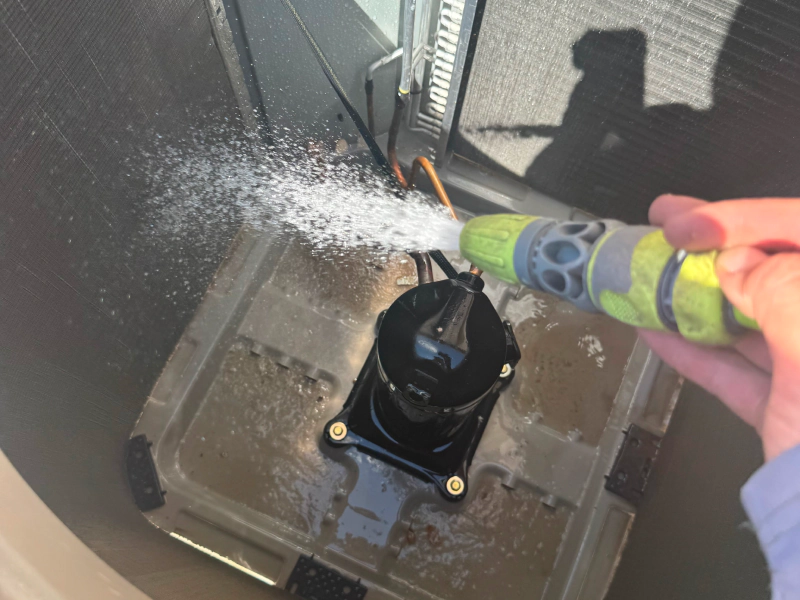
After the coil cleaner has had sufficient time to work, attach your garden hose to a water source and set the nozzle to a gentle, wide spray pattern. High-pressure settings or narrow jet streams can bend fins and force water into electrical components, so avoid using a pressure washer. Begin rinsing from the inside of the coil, working outward. This technique pushes dirt and debris out through the fins rather than deeper into the coil core. Move methodically around the unit, ensuring that all cleaner foam and loosened contaminants are flushed away. You should see dirty water running out the bottom of the unit and onto the ground or tarp below.
Rinse until the water runs clear and no trace of foam remains. This may take several minutes, particularly if the coils were heavily soiled. Inspect the fins closely under good lighting. If you still see buildup in certain areas, apply a second round of cleaner, allow it to dwell, and rinse again. Persistent grease or mineral deposits may require a dedicated degreaser or a slightly longer dwell time, but most residential units respond well to a single thorough cleaning. Once satisfied, turn off the hose and allow the unit to air dry for at least thirty minutes before reassembly. In the low-humidity climate of Laveen, coils typically dry quickly, but avoid rushing this step, as moisture near electrical connections can cause short circuits.
Reconnect any electrical wires you disconnected earlier, referring to your photo if needed. Carefully lower the fan assembly back into place, aligning the screw holes with the mounting points. Replace and tighten all fasteners, ensuring the grille or top panel sits flush and secure. A loose panel can rattle during operation and allow debris to enter the unit. Return to your electrical disconnect box and reinstall the fuses or switch the breaker back to the on position. Then restore power at your main panel. Set your thermostat to cooling mode and observe the unit for a few minutes. You should hear the compressor and fan start smoothly, and airflow from the top of the unit should feel strong and unobstructed. If you notice unusual sounds, vibrations, or weak airflow, power down immediately and consult a licensed HVAC professional to inspect the system before further operation.
When to Call a Professional and Maintaining Long-Term Performance
While homeowner-performed coil cleaning is effective for routine maintenance, certain situations call for professional service. If your coils show signs of corrosion, refrigerant leaks (indicated by oily residue or ice formation), or if the fins are severely damaged across large sections, a licensed HVAC professional can assess whether repair or component replacement is necessary. Similarly, if your system continues to underperform after cleaning, the issue may lie in refrigerant charge, compressor function, ductwork leaks, or other areas that require diagnostic tools and technical training to address safely.
Professional maintenance goes beyond coil cleaning. During an annual tune-up, technicians measure refrigerant levels, test electrical connections and capacitors, lubricate motors, inspect ductwork for leaks, calibrate thermostats, and verify that all safety controls function correctly. In the Laveen and greater Phoenix area, scheduling this service in March or early April, before temperatures climb into the triple digits, ensures your system is ready for the demanding summer months. Many local service providers offer maintenance agreements that include priority scheduling, discounted repairs, and annual inspections, providing a structured approach to system care that complements your own efforts.
Between professional visits, you can extend the benefits of coil cleaning by maintaining the area around your outdoor unit. Regularly remove leaves, grass clippings, and other debris that accumulate near the base. Rinse the exterior of the unit with a garden hose every few weeks during the peak pollen and dust season, typically March through May. Replace your indoor air filter every thirty to sixty days, as a clogged filter forces your system to work harder and can contribute to dirt buildup on the evaporator coil inside your home. Consider installing a shade structure or planting low-growing, non-shedding ground cover around the unit to reduce sun exposure and dirt infiltration without obstructing airflow.
By following the five steps outlined in this guide and integrating them into a broader maintenance routine, you protect one of your home’s most important and expensive systems. Clean condenser coils improve energy efficiency, reduce operating costs, prevent unexpected breakdowns, and extend the overall lifespan of your air conditioning system. Whether you choose to handle routine cleaning yourself or partner with a trusted local HVAC service provider for annual care, the time and effort you invest will pay dividends in comfort, reliability, and long-term savings.